Atlantis Azure Devops check PR approvals

Atlantis is a Terraform Pull Request Automation platform, pretty everybody in your organization can modify terraform code and run plan and apply, that introduce some security/authorization problems that must be properly addressed.

I’ve created a shell script that connect to Azure Devops and check if the PR has been approved by a member of one or more groups, so you can make the PR require an approve by the devops/infrastructure team before the code can be executed in the plan or apply phase.
You should make this script invoked by atlantis during a custom workflow, this will reject a PR that has not been approved by a member of one or more specific groups.

This can be useful to everyone who is using Atlantis with Azure Devops, so i’ve released it on github: https://github.com/davidegiunchi/atlantis-azdevops-check-pr-approvals

AWS AppConfig agent error “connection refused”

AWS AppConfig service it’s useful for feature flag functionality, you can access it directly via API but this is not the suggested method, for production workload it’s a best practice to use the provided agent. If you are using AppConfig on Kubernetes or EKS you should add the appconfig-agent to your deployment by adding:

apiVersion: apps/v1
kind: Deployment
metadata:
  name: my-app
  namespace: my-namespace
  labels:
    app: my-application-label
spec:
  replicas: 1
  selector:
    matchLabels:
      app: my-application-label
  template:
    metadata:
      labels:
        app: my-application-label
    spec:
      containers:
      - name: my-app
        image: my-repo/my-image
        imagePullPolicy: IfNotPresent
      - name: appconfig-agent
        image: public.ecr.aws/aws-appconfig/aws-appconfig-agent:2.x
        ports:
        - name: http
          containerPort: 2772
          protocol: TCP
        env:
        - name: SERVICE_REGION
          value: region
        imagePullPolicy: IfNotPresent

This method will work but in some edge cases you could “randomly” get an exception like this:

cURL error 7: Failed to connect to localhost port 2772 after 0 ms: Connection refused (see https://curl.haxx.se/libcurl/c/libcurl-errors.html) for http://localhost:2772/applications/APPLICATION_NAME/environments/ENVIRONMENT_NAME/configurations/CONFIGURATION_NAME

If you take a look at the logs you could notice that the AppConfig agent has been explicitly shut down:

[appconfig agent] INFO shutdown complete (actual duration: 50ms)
[appconfig agent] INFO received terminated signal, shutting down
[appconfig agent] INFO shutting down in 50ms
[appconfig agent] INFO stopping server on localhost:2772

digging into the logs you could notice that the master container is still working for some seconds after the appconfig-agent has been shut down, that’s the problem! appconfig-agent is very fast to shut down, if your primary container is still working when appconfig has been shut down, your primary container will not be able to connect to the agent and you will get the error.

How to make sure that appconfig-agent is always active in a deployment? the new Sidecar Container feature, added in the recent 1.29 Kubernetes release, is a perfect fit: the container in the sidecar (appconfig-agent) will be the first to start and the last to stop, your primary container will always find the sidecar ready.

Modify the deployment this way:

apiVersion: apps/v1
kind: Deployment
metadata:
  name: my-app
  namespace: my-namespace
  labels:
    app: my-application-label
spec:
  replicas: 1
  selector:
    matchLabels:
      app: my-application-label
  template:
    metadata:
      labels:
        app: my-application-label
    spec:
      containers:
      - name: my-app
        image: my-repo/my-image
        imagePullPolicy: IfNotPresent
      initContainers: 
      - name: appconfig-agent
        image: public.ecr.aws/aws-appconfig/aws-appconfig-agent:2.x
        restartPolicy: Always
        ports:
        - name: http
          containerPort: 2772
          protocol: TCP
        env:
        - name: SERVICE_REGION
          value: region
        imagePullPolicy: IfNotPresent

Kubernetes Certification CKA – readings and advices about how to obtain it

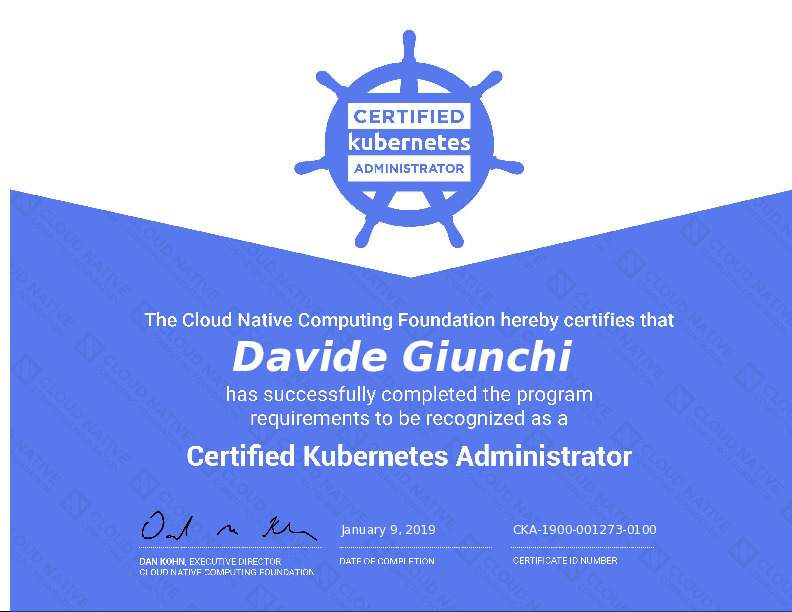
I’ve recently obtained the official “Cerfified Kubernetes Administrator“, some people write me on linkedin asking opinions about how to pass the exam, for this reason i’ve decied to share my experience and write down some advices and userful resources. Every CKA’s candidate must sign an NDA, so i can’t spread specific details.

If you don’t have specific knowledge about container tecnologies and docker, read the O’Reilly’s book “Docker: Up & Running“, the exam doesn’t require specific knowledge about docker but, since Kubernetes is an orchestrator for containers, this is a needed base.

IMHO the best book about k8s is “Kubernetes in Action” , it covers a lot of aspect about this software and it’s very detailed, you don’t need to read it from the beginning till the end, some chapters of the “part 3” are not required by the exam.

In parallel of your readings, you need to do practice, so open an account on a cloud provider that provides managed kubernete’s clusters, by now there’s a lot of providers that support it, the one that it’s considered the best about k8s is Google Cloud Platform. Sign in an account, insert your credit card and you will get free 300$ to be used within 1 year.

First make practice with clusters already created by provider and managed with GKE, you need to understand well how to work with Pod, Deployment, Service, ConfigMap ecc… you need to get very comfortable with the command line kubectl since this is the k8s’s principal CLI.

After that period, learn how to install a cluster: create 3 vm (you can use the g1-small with preemptible feature so you will consume small credit), connect via ssh and create cluster formed by 1 master and 2 worker with kubeadm.

Connect to the servers, check the k8s’s systemd units, where the logs are located and …. broke it! a part of the exam will be about how to do debugging on a broken cluster. After you have fixed the cluseter, destroy the virtual machines, create other 3 machines and re-broke it on another way! 🙂

During the exam you will be allowed to use only the official documentation, so during your tests get accustomed to use https://kubernetes.io/docs , avoid to use StackOverflow&c.

The environment cka-practice-environment is a good test, you can easily use it with docker-compose. The advices in this document are useful, and this “commented curriculum” is useful as a recap before the exam. At the end go through “Kubernetes the Hard Way” to learn how to configure by hand a cluster and understand the details of every component.

When you are ready, schedule the exam. It’s a practice exam that will last 3 hours max, as every Linux Foundation/CNCF’s exam it’s a remote one, you need a computer with Chrome and a particular extension installed, this extension will share your webcam, desktop and the microphone. When the exam will start, you get a Linux console with kubectl already configured with 6 clusters, before every question will be written the kubectl config use-context command to connect to the correct cluster. T all’inizio di ognuna delle 24 domande vi verrà indicato su quale cluster dovete agire tramite kubectl config use-context.

The exam is formed by 24 questions, a minimum score of 74% is required to pass it, the three hours are enough to complete all the exercises, the exam is rigorous but can be passed by anyone who has prepared with commitment.

Good luck!

Certificazione Kubernetes CKA – letture e consigli su come passarlo

cka

English Version

Recentemente ho ottenuto la certificazione ufficiale “Cerfified Kubernetes Administrator“, varie persone mi hanno scritto su linkedin chiedendo pareri su come passare l’esame, per questo motivo ho deciso di condividere la mia esperienza riportando alcuni consigli e risorse utili. Tutti i candidati devono firmare un NDA, non posso quindi divulgare i dettagli precisi.

Se non avete un background sui container e su docker, leggete il libro “Docker: Up & Running” della O’Reilly, l’esame non richiede una competenza specifica su docker ma, visto che Kubernetes gestisce dei container, è necessario avere tale base.

Il libro, secondo me, migliore su k8s è “Kubernetes in Action” della Manning, è molto completo e dettagliato, non è necessario leggerlo tutto dall’inizio alla fine, alcuni capitoli della “parte 3” non sono richiesti dall’esame.

Mentre leggete, è necessario fare pratica, per questo aprite un’account presso un cloud provider che fornisce cluster kubernetes gestiti, ormai sono tanti i provider che lo supportano, quello che è considerato il più avanzato su k8s è Google Cloud Platform. Registrate un account, inserite la carta di credito ed avrete 300$ gratuiti da usare entro 1 anno, dovrebbero bastarvi.

Prima fate pratica su come usare kubernetes su cluster (GKE) già creati dal provider, in modo da capire bene come funzionano Pod, Deployment, Service, ConfigMap ecc… dovrete prendere molta confindenza con la command line kubectl in quanto questo è il tool principale di k8s.

Dopo questa fase passate a come installare un cluster: create 3 vm (potete usare le g1-small in modalità prerilasciabile, in modo da consumare poco credito), collegatevi in ssh e create un cluster formato da 1 master e 2 worker con kubeadm.

Collegatevi alle macchine, controllate i servizi systemd che avviano k8s, dove si trovano i log e …. provate a spaccarlo! parte dell’esame sarà infatti su come effettuare debugging su cluster che non funzionano. Dopo aver sistemato il cluster, distruggete le macchine, createne altre tre e riprovate a spaccarlo in un’altro modo! 🙂

Durante l’esame potrete usare solo la documentazione ufficiale, quindi nelle vostre prove abituatevi ad usare solo https://kubernetes.io/docs come fonte, evitando di addentrarvi su StackOverflow&c.

L’ambiente cka-practice-environment è un ottimo test, potete usarlo facilmente con docker-compose. I consigli in questo documento ricalcano bene gli argomenti che vi ritroverete nell’esame, e questo “curriculum commentato” è utile come recap prima dell’esame. Alla fine addentatevi in “Kubernetes the Hard Way” per capire come configurare a mano un cluster e capire il dettagli di tutti i componenti.

Quando sarete pronti, schedulate l’esame. L’esame è pratico e dura 3 ore, come tutti gli esami della Linux Foundation/CNCF, potete effettuarlo comodamente da casa in quanto è richiesto un pc con Chrome ed una specifica estensione installata, questa estensione condividerà la vostra webcam, il desktop ed il microfono. Quando l’esame inizierà vi verrà presenta una console Linux con un kubectl già configurato per accedere a 6 cluster, all’inizio di ognuna delle 24 domande vi verrà indicato su quale cluster dovete agire tramite kubectl config use-context.

Le tre ore sono sufficienti a completare tutti gli esercizi, l’esame è rigoroso ma ben affrontabile da chiunque si sia preparato con impegno.

In bocca al lupo!

How to enable SELinux on Debian “Stretch” 9

Russel Coker announced it on february, and three days ago it really happen: GNU/Linux Debian version 9.0 codename “Stretch” is out and it supports SELinux!

When you install Debian 9.0, SELinux will not be installed by default, to install and enable it you can follow some simple steps:

Login with root privileges on your debian host, then install the selinux basic utilities and auditd (it’s useful to debug SELinux violations):

# apt-get install selinux-basic auditd

Now you need to modify grub’s configuration to enable selinux on every boot

# selinux-activate

Activating SE Linux
Generating grub configuration file …
Found linux image: /boot/vmlinuz-4.9.0-3-amd64
Found initrd image: /boot/initrd.img-4.9.0-3-amd64
done
SE Linux is activated. You may need to reboot now.

This command will create the “/.autorelabel” file, that will instruct the system do to a full selinux relabel of the filesystem, at the next boot.

Now you can reboot the system:

# reboot

Please wait some minutes to make the relable happen, then you can login on your system and check that SELinux is enabled

# sestatus

SELinux status: enabled
SELinuxfs mount: /sys/fs/selinux
SELinux root directory: /etc/selinux
Loaded policy name: default
Current mode: enforcing
Mode from config file: permissive
Policy MLS status: enabled
Policy deny_unknown status: allowed
Max kernel policy version: 30

As you can read, SELinux is enabled in permissive mode, with that mode you can use SELinux as you wish but it will not block anything, it will only log its activity so you can test it without damage your system or block any activity.

Please note that, at time that i’m writing this article, selinux on debian will log a lot of deny, even with the default configuration and without any particular user activity, so actually i advise you to enable selinux on debian only for testing and in permissive mode.

I will write other posts about SELinux usage, advices ecc.